Actually useful examples Pt1 - Composing a job definition / Aggregation
When you recall the job definition types from the last section, you see that there is a variation of job types:
JUST_WAIT: dummy example that does not do anything useful, theHello Worldexample for job definitions. Just for testing.SEARCH_EVALUATION: legacy format representing a search system evaluation (here for backward-compatibility for now). Is mapped toREQUESTING_TASK_SEQUENCEjob definition.QUERY_BASED_SEARCH_EVALUATION: Simplified / reduced definition compared toSEARCH_EVALUATIONdue to already pre-configured fields. Legacy format representing a search system evaluation (here for backward-compatibility for now). Internally is mapped to aSEARCH_EVALUATIONdefinition, which is then mapped to aREQUESTING_TASK_SEQUENCE.REQUESTING_TASK_SEQUENCE: allows configuration of a sequence of tasks where later tasks can reference values generated by previous tasks via keys. This is the usual type to go for, and other types are actually mapped to this type before they are processed.
In the following we will describe an example configuration of a task sequence that includes
- a) definition of parameter permutations
- b) batching based on single parameters
- c) requesting of a target system per parameter combination
- d) evaluation of metrics per result
- e) persisting of partial results
- f) aggregation of partial results to an overall summary
Configuring the Job
We will be using the FORM mode for configuration here. This is usually the most convenient since most guided method.
- Go to
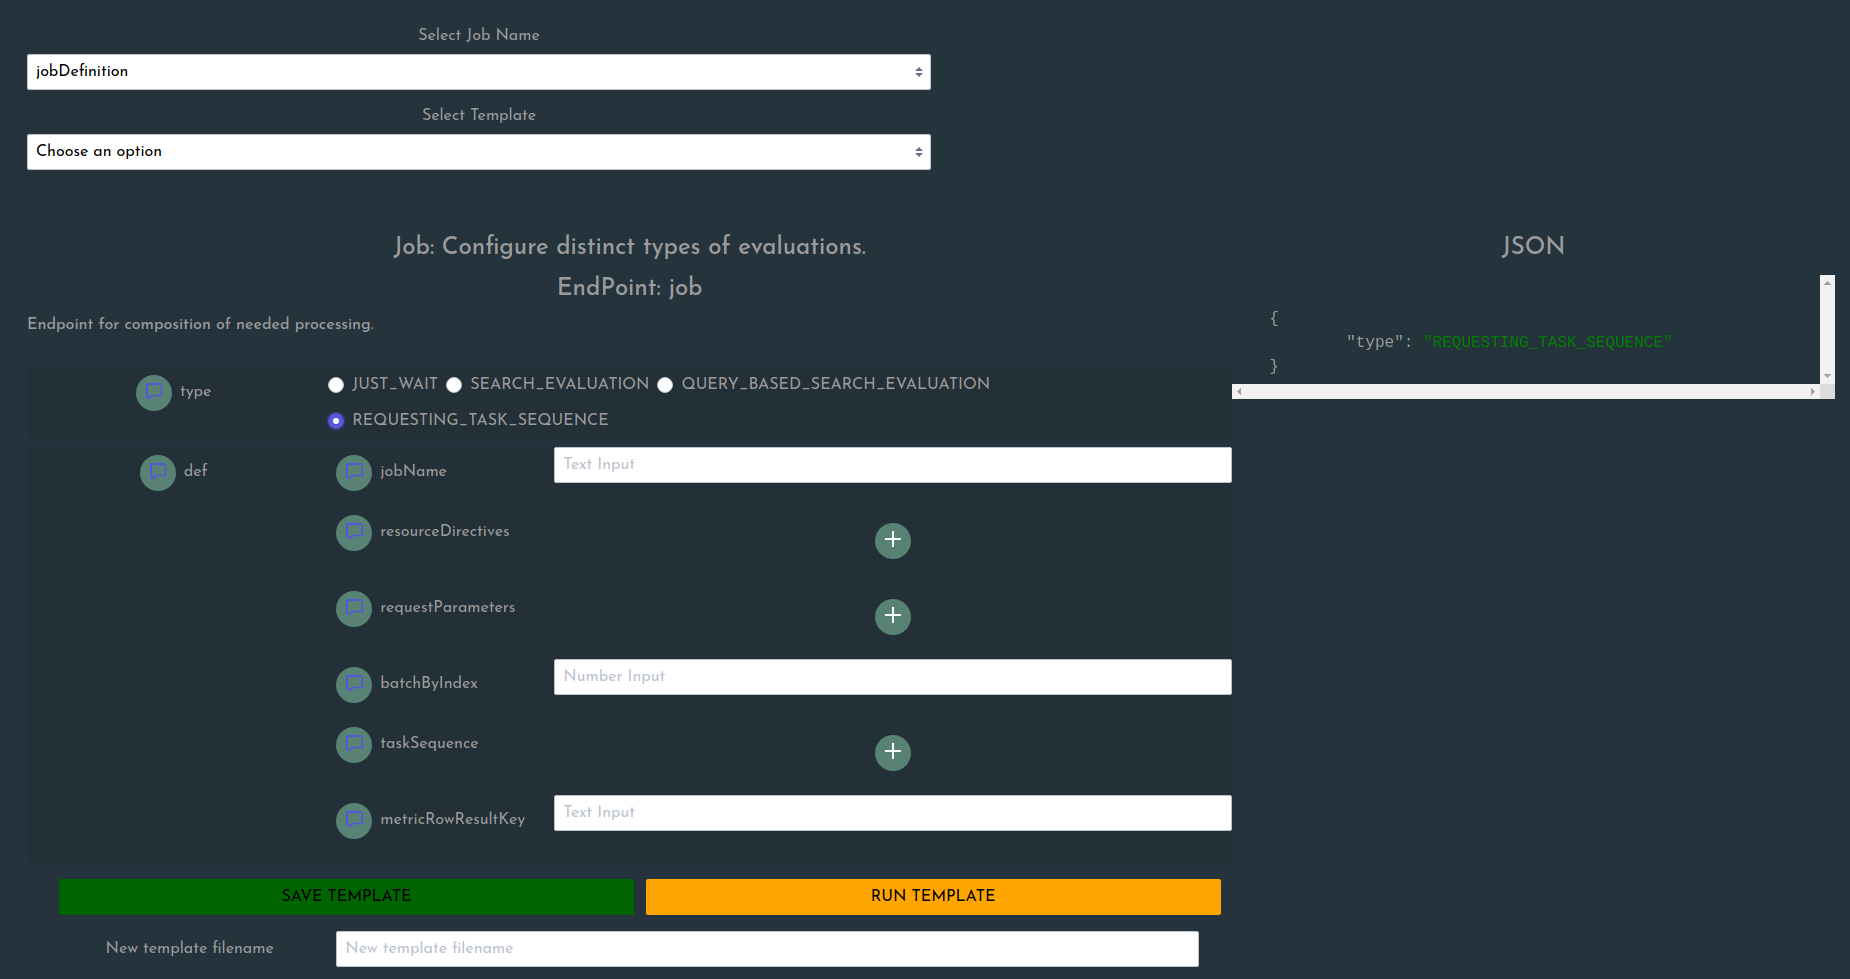
CREATEpage, selectjobDefinitionfor the fieldSelect Job Name type: selectREQUESTING_TASK_SEQUENCE
You will now see relatively few fields (since we actually have not added anything yet):
Now lets enter some details:
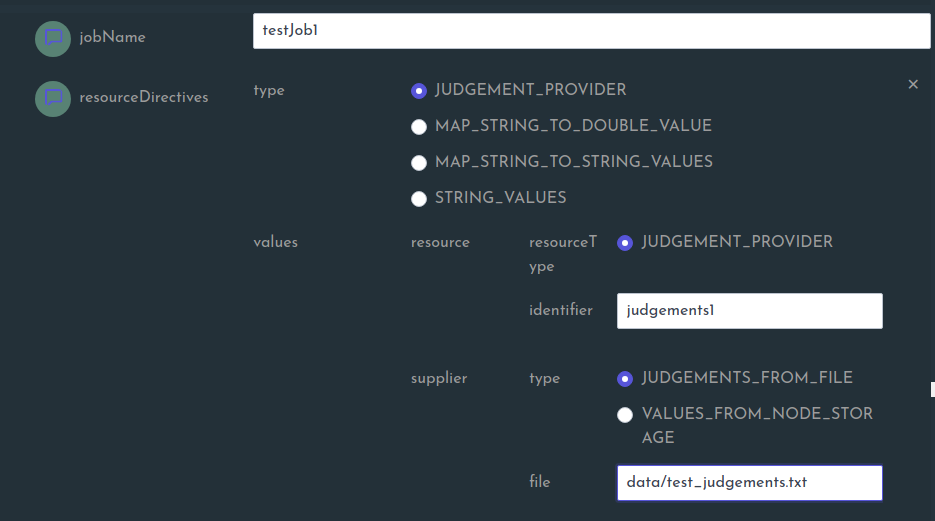
jobName: testJob1resourceDirectives: resource directives define which data should be loaded globally per node. This makes sense for resources shared between different batches, such as judgement lists. We will later be able to reference node-storage resources via the herein definedidentifier. Now we addume that you have a judgement-file relative to the base directory in the following path:data/test_judgements.txt.
Let’s continue by specifying the permutations of parameters:
Add the first parameter with a manually entered value list (there are other ways, dont worry, this will be covered in the
Sourcessection). Here we named itq.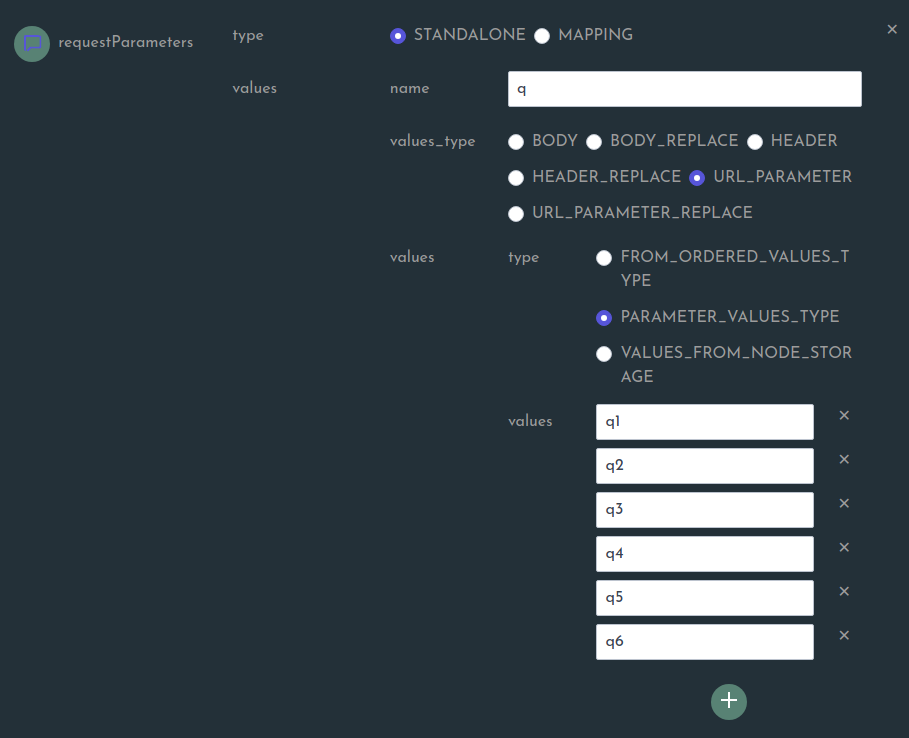
Add another one. Here we name it
param1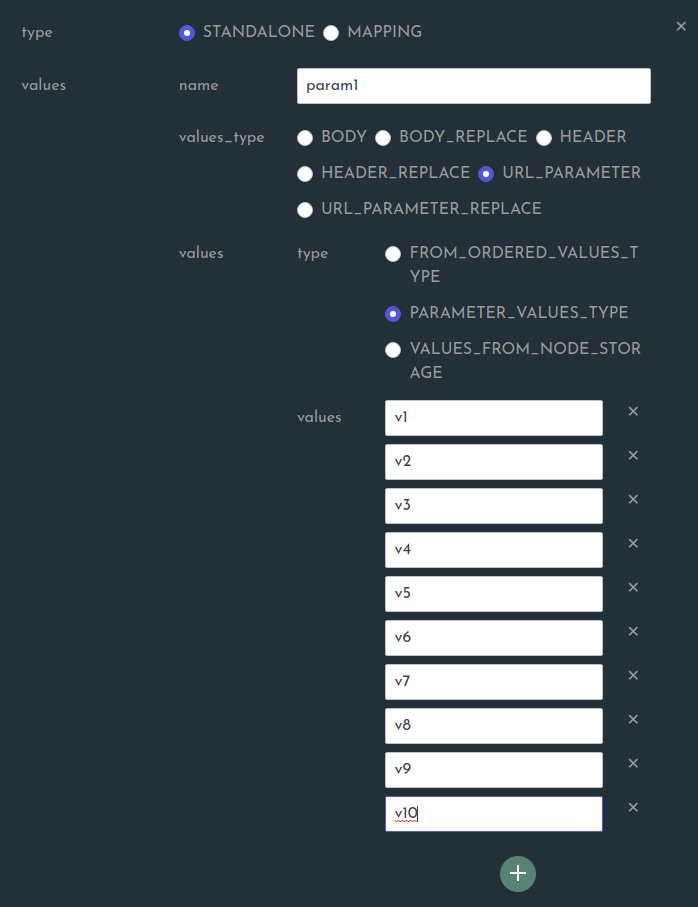
Add a range value. Here we name it
range1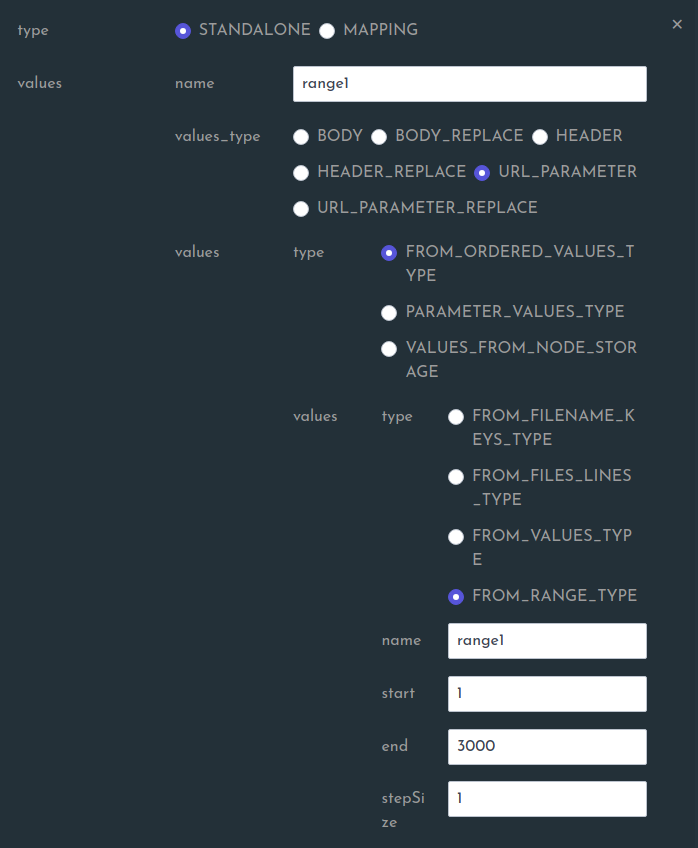
Select the parameter index to form the batches by. Here we select the index 0, which refers to the first parameter defined in the above list, which is the
q-Parameter. We could have picked any other parameter, and the 0-based index always refers to the order in which the parameters were defined (in case a mapping is defined, index refers to its key-values, not their assigned mapped values).

- Now we need to define a
taskSequence. This means we have to compose what will be done with above permutations applied to a http request as initial processing elements. Thus we will define the following task types in the given order:
- a)
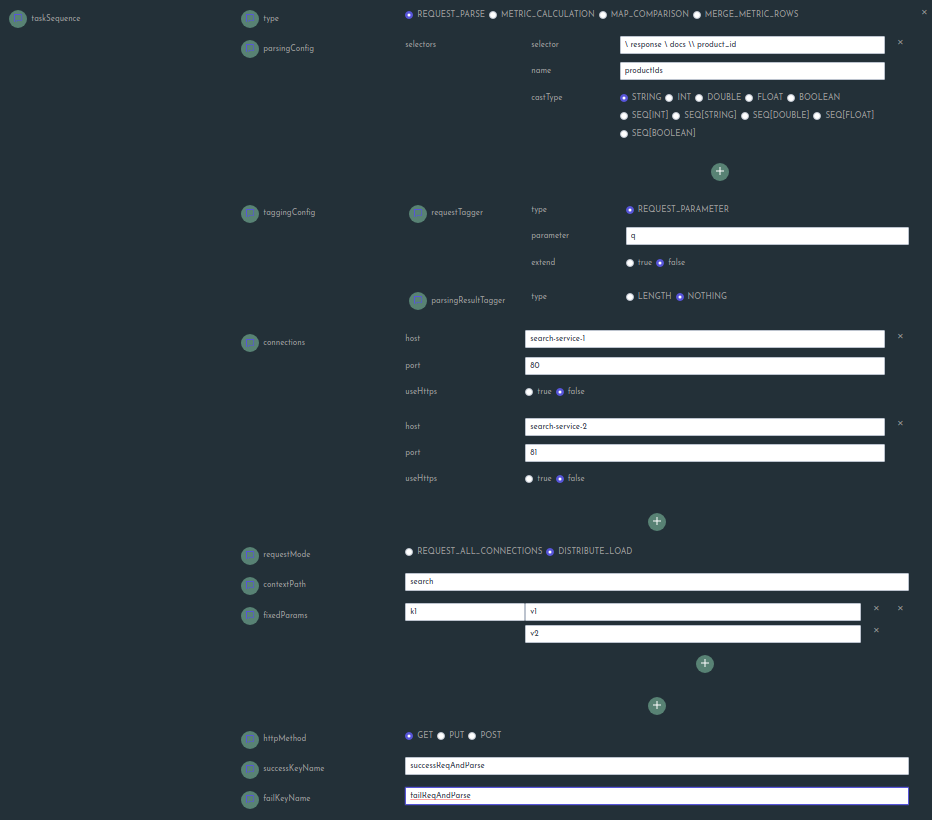
REQUEST_PARSE: to request a target system and extract information - b)
METRIC_CALCULATION: to use the extracted information to calculate the desired metrics
REQUEST_PARSE task definition
METRIC_CALCULATION task definition
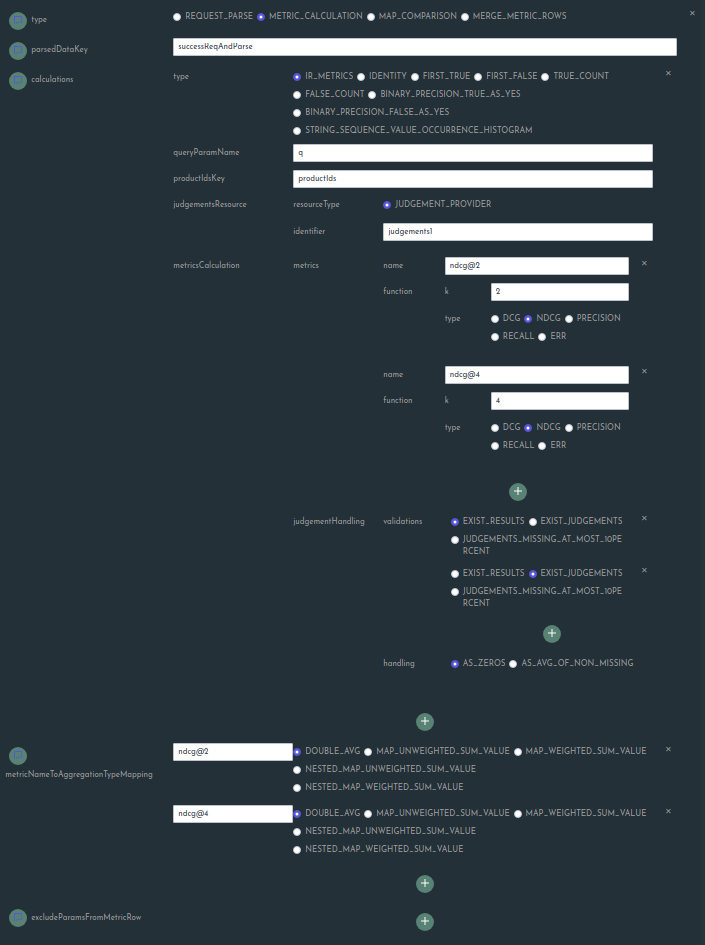
Now it’s only left to configure the key under which the result of the metric calculations can be found.
Since we did not specify any value, we enter the default (NOTE: there is a glitch in the screenshots as the fields
should be contained in the input form. This will be corrected shortly. Also, you will need to press the + besides
excludeParamsFromMetricRow to expand the selection so that the attribute appears in the resulting json format,
but you do not need to enter anything if you don`t want to exclude any field from the metric results)

Now we can store the template and select to transition it to open task.

If we navigate to the STATUS page, we should now see the job if we used the RUN TEMPLATE button on the CREATE
page.

If you made use of the docker-compose file, you should see two instances of response-juggler service set up and running.
This will be needed to actually run the job, since we reference both of these endpoints there.
You can now press on the Start button. You should see a change in the Directives field shortly after showing existence
of a PROCESS directive. Also you should see entries in the Batch Status section after a few moments, showing the process
of the batches.

You will see the negotiation process also in the service logs (yes, here it is a bit pointless since we only started one node :)):

Now you can observe the process status in the STATUS page. After completion you should fine the result files in json and csv format
in the respective results subfolder.
CONGRATULATIONS, your first job definition looks lovely!
Aggregation Options
Defining whole jobs is not the only option we have. We can also post single tasks that are directly executed on the receiving node. This might include functions such as aggregating partial results to an overall summary or other computations.
The currently provided options are:
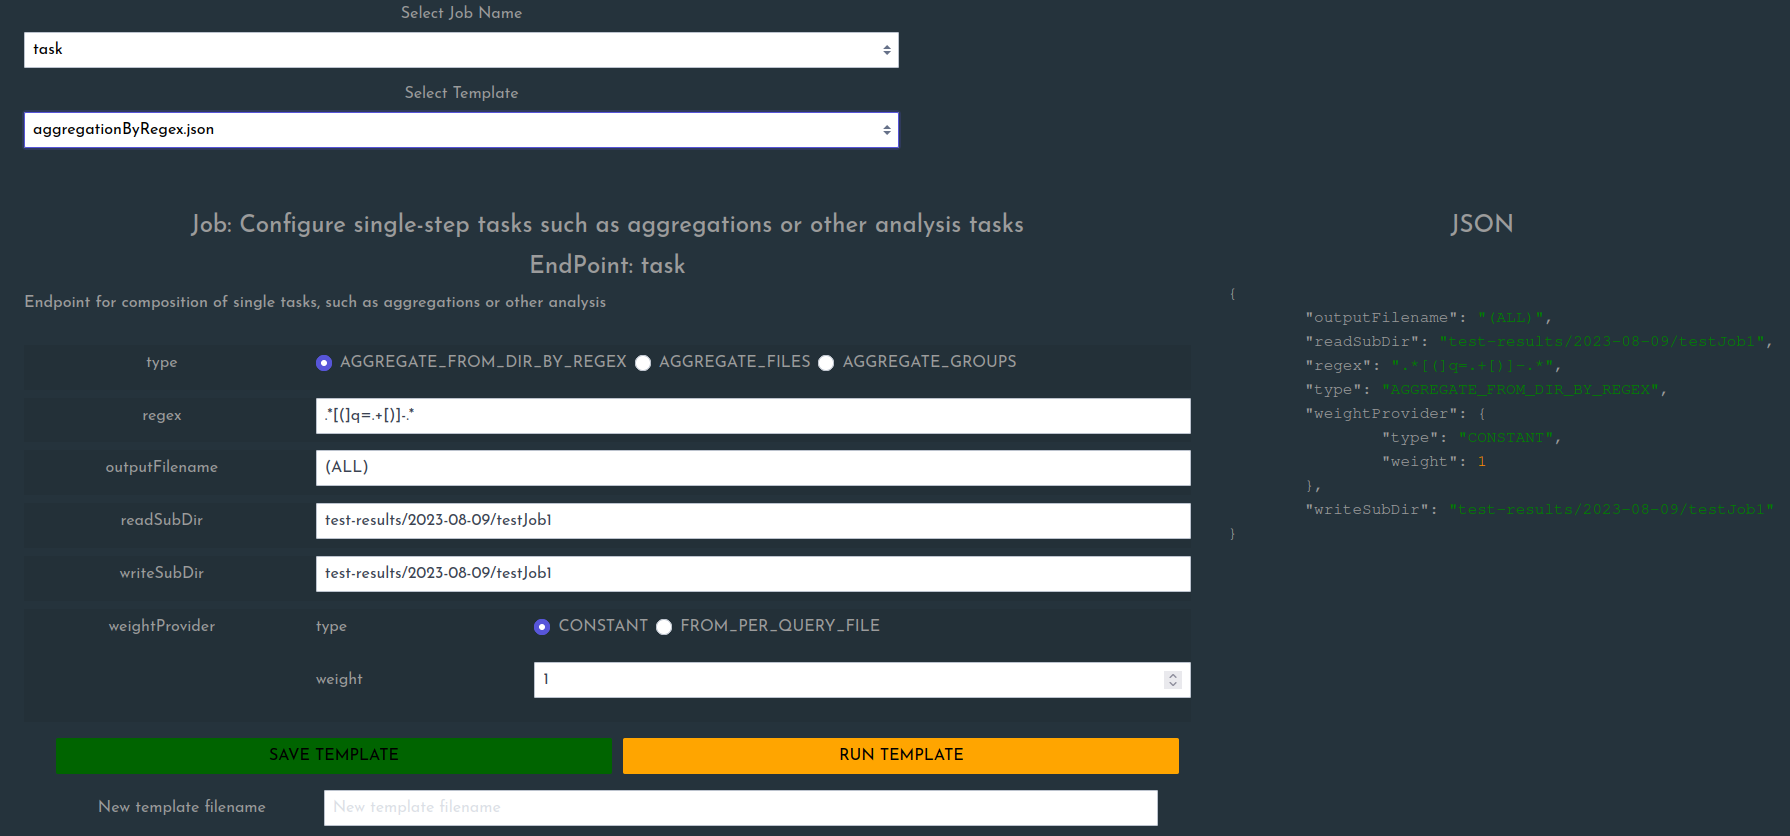
AGGREGATE_FROM_DIR_BY_REGEX: aggregate result files from a specified folder after filtering them by matching the files in that folder against a regex and store the result file (name given byoutputFilename) into the configured writeSubDir (relative to the configured base path).AGGREGATE_FILES: specify single specific files to aggregateAGGREGATE_GROUPS: specify groups either manually via UI (groupId → [query1, query2,…]) mappings or via a provided group file. Further, the settingweightProvidereither setting constant weight for all queries or specific weights for each query.
Below we see an example of an aggregation that picks result files from the defined folder (see below), given a regex that is matched against the files in that folder.
